
In This Article
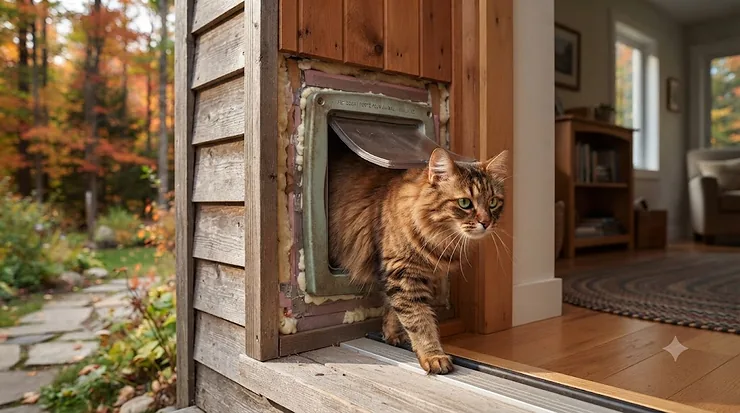
Old Ontario farmhouses. Prairie character homes with double-brick exteriors. Century-old Montreal triplexes with walls thick enough to double as a wine cellar. If you live in one of these and you’re shopping for a cat door for thick wall installations, you’ve probably already discovered the annoying truth: most cat flaps sold at the big box store are built for a hollow-core interior door, not a 25 cm slab of masonry. A cat door for thick wall use is any pet door system engineered with an extendable tunnel or telescoping frame long enough to bridge a wall thicker than the standard 4-5 cm door panel, keeping the passage sealed, level and draft-free the whole way through.
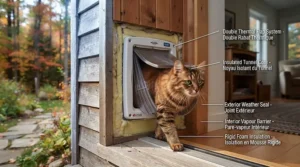
That’s a mouthful, but here’s the short version: your cat doesn’t care about the tunnel length, your heating bill does. Here’s what most homeowners overlook — a poorly extended tunnel doesn’t just look sloppy, it becomes a drafty pipe straight from your living room to a Winnipeg windchill. We dug through real specifications, aggregated review sentiment, and manufacturer documentation for seven genuine products sold to Canadian shoppers, so you can match the tunnel to your actual wall rather than guessing and returning the wrong box twice. Along the way we’ll touch on wall cat flap tunnel extension hardware, insulated wall cat door options, cat door installation brick wall realities, wall depth pet door measuring, cat flap tunnel extender compatibility, and masonry cat door installation specifics — because “thick wall” means something different if you’re working with 2×6 studs versus solid block.
Before you measure twice and cut once, it’s worth understanding why wall depth trips up so many buyers in the first place. According to Natural Resources Canada’s guide to comprehensive home air leakage control, sealing up small gaps and cracks throughout a home’s envelope is one of the single most effective retrofit steps a homeowner can take — a tunnel gap is exactly the kind of hole that undoes that work.
Quick Comparison Table
| Product | Wall Thickness Range | Best For | Price Range (CAD) |
|---|---|---|---|
| PetSafe Wall Entry Aluminum Pet Door with Telescoping Tunnel | 12-18 cm (extendable further with add-on) | All-around wall installations, dogs and cats | around C$180-C$230 |
| PetSafe Wall Entry Pet Door Extension Tunnel | Adds up to 30 cm more depth | Extra-thick brick or block walls | around C$65-C$90 |
| PetSafe Microchip Cat Flap Tunnel Extension | Adds 5 cm per segment | Stacking onto a microchip flap | around C$25-C$40 |
| SureFlap Microchip Cat Flap Tunnel Extender | Adds 5 cm per segment | Premium microchip-secure entries | around C$25-C$40 |
| Cat Mate Elite Wall Liner (308) | Adds 5 cm per liner section | Budget-conscious timer-flap owners | around C$20-C$35 |
| Baboni 3-Flap Steel Wall Pet Door | 20-32 cm (8″-12.7/16″) | Solid masonry and block walls | around C$140-C$190 |
| The Kitty Pass Wall Entry Cat Door | Standard 2×4 stud wall (roughly 11-13 cm) | Interior walls and hidden litter box access | around C$190-C$260 |
Looking at the table, the split is really between two shopping paths: buy a tunnel accessory to extend a flap you already own (PetSafe Microchip Cat Flap Tunnel Extension, SureFlap Microchip Cat Flap Tunnel Extender, Cat Mate Elite Wall Liner (308)), or buy a complete wall-entry system built to handle depth from the start (PetSafe Wall Entry Aluminum Pet Door with Telescoping Tunnel, Baboni 3-Flap Steel Wall Pet Door, The Kitty Pass Wall Entry Cat Door). If your wall runs deeper than about 18-20 cm, even the telescoping systems typically need the dedicated PetSafe Wall Entry Pet Door Extension Tunnel stacked on top. Budget shoppers gravitate toward the Cat Mate and PetSafe liner segments since they’re sold individually and let you buy only the length you need.
💬 Just one click — help others make better buying decisions too!😊
Top 7 Cat Doors for Thick Walls: Expert Analysis
1. PetSafe Wall Entry Aluminum Pet Door with Telescoping Tunnel — best all-around wall installation
The telescoping aluminum frame is the headline feature here, and it earns the spot. Rather than a fixed-depth tunnel, this door’s frame slides to fit, which matters a lot once you realize most Canadian exterior walls aren’t a tidy, uniform thickness from top to bottom.
The base unit handles walls from roughly 12 to 18 cm out of the box, with double replaceable flaps and a slide-in closing panel for nights when you want the entry sealed shut. That closing panel matters more than it sounds — it’s the difference between a pet door that becomes a wind tunnel in February and one you can button up before a cold snap. The aluminum shell also resists the warping that cheaper PVC frames develop after a few freeze-thaw cycles.
Based on the spec comparison against the accessory-only tunnel extenders further down this list, this is the right starting point if you don’t already own a cat flap — it’s a complete kit, not a bolt-on. It suits homeowners who want one purchase that solves the whole wall-thickness problem rather than assembling a system piece by piece. Reviewers consistently report that installation is manageable as a weekend DIY project, though several note the cut-out template needs to be traced with real care, since even a few millimetres off makes the frame bind.
Pros:
- ✅ Telescoping frame adapts to varying wall depths
- ✅ Aluminum construction resists warping and rust
- ✅ Slide-in closing panel adds nighttime security
Cons:
- ❌ Needs a separate extension for walls over 18 cm
- ❌ Cut-out template must be traced precisely
Priced around C$180-C$230 at the time of research, this sits in the mid-range and delivers strong value if your wall thickness is close to standard brick-and-block dimensions.
2. PetSafe Wall Entry Pet Door Extension Tunnel — extra reach for extra-thick brick and block walls
This is the accessory that solves the problem the base kit above can’t handle alone: walls thicker than about 18 cm. Think double-wythe brick, poured concrete, or a heavily insulated new-build wall assembly.
The extension bolts onto the existing PetSafe telescoping tunnel and adds up to roughly 30 cm of additional depth, which covers most masonry and block wall scenarios found in older Canadian housing stock. What most buyers overlook about this accessory is that it can be trimmed shorter for in-between wall thicknesses rather than only used at full length, so you’re not stuck choosing between “too short” and “way too long.” On paper this means one extension kit covers a wide band of wall depths instead of forcing you to order multiple sizes and return the wrong one.
Aggregated review sentiment describes the trimming process as straightforward with a basic hand saw, though a few users mention the seam between the base tunnel and the extension needs a bead of exterior-grade sealant to stay fully weatherproof — a five-minute fix that isn’t mentioned on the product listing itself.
Pros:
- ✅ Adds up to 30 cm of extra tunnel depth
- ✅ Trimmable for custom in-between wall thicknesses
- ✅ Compatible with the matching PetSafe wall door frame
Cons:
- ❌ Only works with PetSafe’s own wall door system
- ❌ Seam needs manual sealant for full weatherproofing
At around C$65-C$90, it’s a reasonable add-on cost once you’ve already invested in the base wall door, making the combined system land in the mid-to-premium range overall.
3. PetSafe Microchip Cat Flap Tunnel Extension — stackable security for a microchip flap
If you already own or plan to buy a PetSafe Microchip Cat Flap, this is the matching tunnel accessory, and its main selling point is modularity. Each segment adds 5 cm, and you simply stack as many as your wall requires.
Here’s what the spec sheet won’t tell you outright: because each piece is glued rather than mechanically fastened, the final tunnel is genuinely rigid once cured, not a wobbly plastic sleeve. That translates to a tighter door seal in practice, since the flap’s magnetic closure depends on a true, unflexing surface to seat against. For a household that’s already committed to microchip-based entry — which reliably keeps out the neighbourhood cats that a simple flap can’t distinguish — this keeps that security intact regardless of wall depth.
Reviewers consistently note that no tools are required for assembly, which is a real plus for anyone who’d rather not rent a hole saw for a one-off project, though a handful of buyers on both amazon.ca and amazon.com report the segments being intermittently out of stock, so ordering with a little lead time is wise.
Pros:
- ✅ Each 5 cm segment stacks for custom tunnel length
- ✅ No tools needed for glue-in assembly
- ✅ Keeps microchip flap’s tight door seal intact
Cons:
- ❌ Availability can be inconsistent
- ❌ Only fits the PetSafe Microchip Cat Flap system
Individual segments run around C$25-C$40, so a typical thick-wall project needing three or four segments lands in the C$75-C$160 range — still less than most complete wall-entry kits.
4. SureFlap Microchip Cat Flap Tunnel Extender — premium microchip recognition, modular tunnel
SureFlap built its reputation on microchip and RFID-collar recognition that reads a cat’s actual chip number rather than relying on a magnetic collar tag that any cat (or curious raccoon with a matching tag) could trigger. The tunnel extender is the wall-installation companion piece, and each unit adds 50 mm to the existing 70 mm tunnel.
Multiple extenders stack together, so a typical double-brick wall might need two or three units glued in sequence. Based on the spec comparison with the PetSafe microchip accessory above, the practical difference is mostly about ecosystem: if your household already runs a SureFlap DualScan or Connect flap — useful for multi-cat homes where one cat needs to come in but a housemate’s cat needs to stay out — this extender is the only officially compatible option.
A common theme in aggregated review sentiment is that SureFlap’s recognition software is unusually reliable at keeping out other cats, which matters if you live somewhere with a active neighbourhood cat population. On the flip side, several reviewers flag that the extenders are sold individually at a price that adds up quickly for genuinely thick walls, and that batteries in the associated flap need more frequent changes in extreme cold, which is a real Canadian-winter consideration.
Pros:
- ✅ 50 mm segments stack for custom tunnel depth
- ✅ Compatible with highly regarded microchip recognition flaps
- ✅ Snug factory fit onto the SureFlap tunnel base
Cons:
- ❌ Per-unit cost adds up for very thick walls
- ❌ Cold weather can shorten flap battery life
At roughly C$25-C$40 per extender, the value proposition depends on how many segments your wall demands — for a standard interior partition it’s excellent, for 30+ cm of solid masonry it’s worth comparing against a full wall-entry kit instead.
5. Cat Mate Elite Wall Liner (308) — the budget-friendly liner kit with timer-flap compatibility
Cat Mate’s approach mirrors the PetSafe and SureFlap tunnel accessories, but it’s aimed squarely at owners of the Cat Mate Elite Microchip Cat Flap with its digital timer and LCD activity display — a flap that lets you set an overnight curfew without getting up to lock the door manually.
Each liner section adds roughly 5 cm, and Cat Mate explicitly recommends running a bead of exterior sealant between liners plus duct tape on the outer seam for a moisture-resistant tunnel — an honest bit of guidance that most competing brands leave out of their instructions entirely. What that tells us: this is a company that expects its product to be installed into real, weather-exposed exterior walls, not just interior partitions, and writes the manual accordingly.
For some Cat Mate flap models, an additional adapter kit is required alongside the liner for a clean fit, so budget-conscious buyers should double check their exact flap model before ordering just the liner alone. Reviewers describe the timer function itself as genuinely useful for controlling nighttime access, and note the liner assembly as easy, though a few mention the individual sections are visibly plasticky compared to the aluminum PetSafe extension.
Pros:
- ✅ Lowest per-segment cost on this list
- ✅ Manufacturer gives real weatherproofing instructions
- ✅ Pairs with useful timer-curfew flap features
Cons:
- ❌ May require a separate adapter kit for some models
- ❌ Plastic build feels less premium than aluminum options
At around C$20-C$35 per section, this is the most wallet-friendly path to a longer tunnel, especially for households already sold on the Cat Mate ecosystem.
6. Baboni 3-Flap Steel Wall Pet Door — the steel-frame option built for block and brick
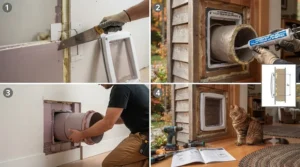
Where most entries on this list are plastic-tunnel accessories, the Baboni 3-Flap Steel Wall Pet Door is a complete kit with a steel frame and a telescoping tunnel rated for roughly 20-32 cm of wall thickness — squarely in double-brick and concrete block territory.
The triple-flap design (as opposed to the double-flap standard on most PetSafe kits) creates two air pockets rather than one, which on paper should meaningfully cut down on drafts compared to a single-flap opening. Reviewers consistently mention the aluminum lock slide as a genuinely secure overnight lockout, sturdier than the plastic slide panels found on some cheaper wall kits. What most buyers overlook when comparing steel-frame kits like this one against aluminum competitors is weight — steel is heavier to manoeuvre during installation, so a two-person job is realistic here even though the listing markets it as a solo DIY project.
Because it’s rated for pets up to about 45 kg, it comfortably serves cats and smaller dogs, making it a reasonable choice for mixed-pet households rather than a cat-only purchase. Aggregated review sentiment flags the instruction manual as serviceable but not as detailed as PetSafe’s, so first-time wall-cutters may want to watch an installation video alongside the printed steps.
Pros:
- ✅ Rated for genuinely thick masonry walls (20-32 cm)
- ✅ Triple-flap design adds a second insulating air pocket
- ✅ Steel frame and lock slide feel built to last
Cons:
- ❌ Heavier and more awkward for solo installation
- ❌ Instructions are thinner than premium competitors
Priced around C$140-C$190, it undercuts most complete aluminum wall-entry systems while covering a deeper wall range, which is a strong value argument for anyone with genuine double-brick construction.
7. The Kitty Pass Wall Entry Cat Door — the interior tunnel that hides the litter box behind a closed door
This one solves a completely different problem than the other six, and it’s worth including because “thick wall” doesn’t only mean an exterior brick wall — it also means the standard interior partition many Canadian homes use to hide a litter box in a closet or spare bathroom.
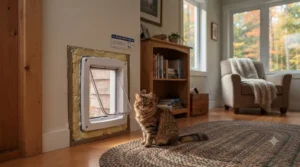
Designed specifically for standard 2×4 stud construction with 1.25 cm drywall on both sides, The Kitty Pass Wall Entry Cat Door installs in roughly 15-25 minutes according to the manufacturer, using a supplied template. Here’s the honest analytical take: it isn’t marketed or built for exterior weatherproofing, so don’t mistake it for an insulated wall cat door meant to face a Canadian winter — its entire value proposition is a clean, finished-looking passage between two interior rooms, letting a cat reach a litter box or feeding station while the door stays visually closed to guests.
Reviewers consistently praise how “built-in” the finished product looks compared to a flap simply screwed onto a hollow door, and several specifically mention it solved litter box odor and mess complaints from visiting family. On the downside, a few buyers note the fixed depth assumes true standard stud-wall construction, so it won’t stretch to fit a thicker load-bearing or double-layer partition without extra carpentry.
Pros:
- ✅ Purpose-built for standard 2×4 interior stud walls
- ✅ Finished look hides litter box access neatly
- ✅ Fast install, roughly 15-25 minutes with template
Cons:
- ❌ Not designed for exterior weatherproofing
- ❌ Fixed depth doesn’t stretch for non-standard walls
At around C$190-C$260, it’s priced at the premium end of this list, which reflects its finished, furniture-grade appearance rather than raw tunnel length.
Top 7 Products: Detailed Comparison
| Product | Frame Material | Flap Type | Wall Depth Coverage | Best For |
|---|---|---|---|---|
| PetSafe Wall Entry Aluminum Pet Door with Telescoping Tunnel | Aluminum | Double flap | 12-18 cm | Complete wall-door starter kit |
| PetSafe Wall Entry Pet Door Extension Tunnel | Plastic/aluminum hybrid | N/A (accessory) | +30 cm add-on | Extra-thick brick and block walls |
| PetSafe Microchip Cat Flap Tunnel Extension | Plastic | Microchip (paired flap) | +5 cm per segment | Stacking onto microchip flaps |
| SureFlap Microchip Cat Flap Tunnel Extender | Plastic | Microchip (paired flap) | +5 cm per segment | Multi-cat microchip security |
| Cat Mate Elite Wall Liner (308) | Plastic | Timer/microchip (paired flap) | +5 cm per segment | Budget timer-flap owners |
| Baboni 3-Flap Steel Wall Pet Door | Steel | Triple flap | 20-32 cm | Solid masonry and block |
| The Kitty Pass Wall Entry Cat Door | Composite | Single interior flap | Standard 2×4 stud wall | Interior litter box access |
The spread above makes the shopping decision clearer once you separate wall type from flap philosophy: masonry and block walls point you toward the Baboni 3-Flap Steel Wall Pet Door or a PetSafe Wall Entry Aluminum Pet Door with Telescoping Tunnel plus its matching extension, while anyone upgrading an existing microchip flap should look at the accessory tunnels from PetSafe, SureFlap, or Cat Mate. Interior partition walls are really a category of one here, since The Kitty Pass Wall Entry Cat Door is purpose-built for that job and nothing else on this list attempts it. If security against neighbourhood cats matters more to you than raw tunnel depth, the microchip-based options edge out the mechanical flap on the Baboni and base PetSafe kits.
✨ Don’t Miss These Exclusive Deals!
🔍 Take your wall pet door project to the next level with these carefully selected products. Click on any highlighted item to check current pricing and availability. These tunnel kits will help you create a genuinely draft-free, secure entry your cat — and your heating bill — will thank you for!
How to Install a Wall Cat Flap Tunnel Extension: Step-by-Step
Installing a tunnel extension is genuinely a weekend project for most homeowners, but the first-30-days mistakes are almost always about sequencing, not skill.
Start by confirming your actual wall depth with a tape measure pushed straight through an existing opening, a window frame, or a test hole — never trust the “standard wall thickness” number in a product listing, since renovations, extra drywall layers, or added insulation change the real figure. Next, dry-fit the base flap or door frame without any adhesive to confirm the tunnel segments you’ve ordered actually reach flush on both interior and exterior faces; this is the single most skipped step and the top cause of returns. Once the dry fit is confirmed, trace your cut-out template precisely, then cut the opening slightly undersized rather than oversized — you can always sand or trim a snug opening, but you can’t un-cut drywall or brick. Glue tunnel segments in sequence per the manufacturer’s instructions, wiping excess adhesive immediately so it doesn’t squeeze into the flap’s swing path. Finally, run a bead of exterior-grade sealant around the outer seam where the tunnel meets your siding or masonry, and test the flap’s swing and magnetic seal before you consider the job finished.
For maintenance, plan to inspect the seal every autumn before the heating season starts — magnetic strips and brush seals degrade with UV exposure and cold-flex over a few Canadian winters, and a five-minute check beats an unexplained draft in January. A common first-30-days mistake is skipping the dry fit entirely and gluing segments straight from the box, which locks in a misalignment that’s expensive to correct later.
Real-World Scenarios: Matching the Right Tunnel to Your Situation
The century-home owner in Halifax: Solid double-brick construction, roughly 28 cm thick, budget around C$200. This household is the textbook case for the Baboni 3-Flap Steel Wall Pet Door — its 20-32 cm rated range covers the wall without stacking multiple accessory pieces, and the triple-flap design helps offset the fact that older brick homes often already run colder than newer builds.
The condo owner converting a laundry-room partition in Toronto: Standard 2×4 interior stud wall, cat needs discreet litter box access, appearance matters because guests use that hallway. The Kitty Pass Wall Entry Cat Door fits this brief precisely — fast install, finished look, and no exterior weatherproofing concerns since the wall is fully interior.
The multi-cat household in a Calgary bungalow with an existing SureFlap DualScan flap: Exterior wall thickness around 20 cm, already invested in microchip recognition to keep one resident cat’s territorial housemate from following her in. Two SureFlap Microchip Cat Flap Tunnel Extender units stacked onto the existing flap solve the depth problem without replacing hardware that already works well and that the household trusts.
Each of these profiles shares one lesson: match the tunnel to the wall you actually have, not the wall the packaging assumes.
Common Wall Cat Door Problems (And How to Fix Them)
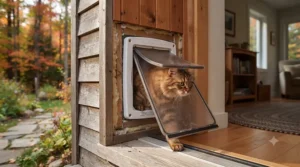
Problem: the flap won’t sit flush, leaving a visible gap. This is almost always a wall-depth miscalculation. Solution: remeasure with the tunnel dry-fit before gluing, and choose a stackable accessory like the Cat Mate Elite Wall Liner (308) or PetSafe Microchip Cat Flap Tunnel Extension to fine-tune length in 5 cm increments rather than committing to one fixed-length product.
Problem: cold drafts around the tunnel seam in winter. This points to an unsealed exterior joint. Solution: apply exterior-grade sealant where the tunnel meets siding or masonry, and consider a double- or triple-flap system like the Baboni 3-Flap Steel Wall Pet Door for a genuine second air pocket.
Problem: raccoons or neighbourhood cats using the flap. A mechanical flap only recognizes a magnetic collar tag, which any similarly tagged animal can trigger. Solution: switch to a microchip-recognition system such as the SureFlap Microchip Cat Flap Tunnel Extender or PetSafe Microchip Cat Flap Tunnel Extension, both of which read a unique chip ID rather than a generic magnet.
Problem: the tunnel extension is out of stock when you need it. Solution: order slightly more segments than your measured depth requires, since most brands allow trimming shorter but obviously can’t be stretched longer, and lead times on accessory pieces can run a week or two.
Problem: masonry cutting looks intimidating. Solution: rent a diamond-blade rotary tool or hire a handyman for the cut-out only, then handle the tunnel assembly and sealing yourself — splitting the job this way keeps costs down without requiring you to own specialty masonry tools.
How to Choose a Cat Door for a Thick Wall
Choosing the right system comes down to five practical checks, roughly in this order:
- Measure your actual wall depth first. Don’t estimate — a real measurement determines whether you need a single kit or a stacked accessory approach.
- Decide between a complete kit and an accessory tunnel. If you own a flap already, buy the matching extender; if not, a complete system like the PetSafe Wall Entry Aluminum Pet Door with Telescoping Tunnel avoids compatibility guesswork.
- Weigh security needs. Microchip recognition from SureFlap or PetSafe prevents unwanted animals from entering, which matters more in areas with active outdoor cat populations.
- Check insulation and flap count. Double- or triple-flap designs reduce draft in a Canadian climate far more effectively than a single flap.
- Confirm wall type compatibility. Masonry, block, and stud-wall installations aren’t interchangeable — a product rated for one won’t necessarily suit another without extra hardware.
- Verify pet size against the flap opening, especially in multi-pet homes where a small dog might also need to pass through.
- Budget for sealant, an adapter kit, or a trim tool separately, since several of these products assume basic supplies you’ll need to buy alongside the main purchase.
Wall Depth and Pet Door Sizing, Explained
Wall depth pet door sizing trips up more buyers than any other spec on this list, mostly because manufacturers often list a “standard” range that assumes a bare, uninsulated stud wall. Add exterior siding, interior drywall, a vapour barrier, and any retrofit insulation, and the real number climbs fast. Canadian Geographic’s explainer on R-values in Canadian homes notes that wall studs themselves act as thermal bridges, conducting heat between the interior and exterior even where the surrounding cavity is insulated — meaning even a “standard” wall assembly is rarely as thin or as simple as a product spec sheet implies. The practical fix is boring but effective: measure at the exact spot you plan to cut, not at a random point on the wall, since depth can vary by a centimetre or two even within the same wall run.
Insulated Wall Cat Door vs Standard Cat Flap: What Actually Keeps the Cold Out
An insulated wall cat door and a standard door-mounted cat flap solve different problems, and conflating them is where a lot of buyers go wrong. A standard flap mounted on a hollow interior or exterior door typically has one thin flap and minimal air-gap insulation, because it’s designed for a door panel only a few centimetres thick. A genuine insulated wall cat door — like the double-flap PetSafe Wall Entry Aluminum Pet Door with Telescoping Tunnel or the triple-flap Baboni 3-Flap Steel Wall Pet Door — creates one or two enclosed air pockets inside the tunnel itself, which functions similarly to how double glazing traps a layer of still air between panes.
Building-science guidance consistently points out that a wall’s real, effective R-value is always lower than its nominal insulation rating once framing members and other thermal bridges are factored in — a useful reminder that a tunnel punched straight through a wall’s insulation layer needs its own air-gap design to avoid becoming a bridge of its own. Reviewers consistently report a noticeable difference in draft between single- and multi-flap tunnel systems once temperatures drop below freezing, though no product on this list is a substitute for proper sealant at the seams. The honest verdict: budget-conscious buyers with mild climates or south-facing walls can often get by with a single-flap accessory tunnel, but anyone in a genuinely cold region should prioritize a double- or triple-flap system regardless of the small price premium.
Common Mistakes When Buying a Wall Cat Door
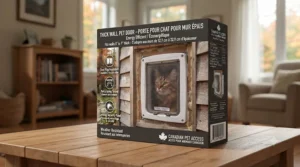
The single most common mistake is buying based on the product photo rather than the wall-depth spec, which is easy to do when every listing photo looks roughly the same. A close second is skipping the compatibility check on accessory tunnels — the PetSafe Microchip Cat Flap Tunnel Extension only fits PetSafe’s own microchip flap, and the SureFlap Microchip Cat Flap Tunnel Extender is similarly locked to its own ecosystem, so mixing brands simply won’t work. Buyers also frequently underestimate installation time on masonry walls specifically, assuming a weekend project that then stretches into two because a rented cutting tool needs to be picked up and returned. Finally, many shoppers skip reading aggregated review sentiment for cold-weather performance, then discover in their first winter that a single-flap tunnel drafts more than they expected — a problem entirely avoidable by choosing a multi-flap system from the start if you live somewhere the mercury regularly drops below -15°C.
What to Expect: Real-World Performance Through a Canadian Winter
Specs on a listing page describe a product in isolation; a Canadian winter tests it as part of a whole house system. In practice, that means the magnetic or brush seal on any flap will stiffen slightly in deep cold, so expect marginally more resistance when your cat pushes through in January than in July — this is normal and not a sign of a defective product. Double- and triple-flap tunnels genuinely do perform differently than single-flap versions once outdoor temperatures swing into negative double digits; the extra air pocket measurably slows heat transfer compared to a single thin barrier, echoing the same air-pocket principle used in double-glazed windows. Homeowners installing in unheated additions or three-season porches should also expect condensation to form on tunnel interiors during rapid temperature swings, which is a moisture-management issue rather than an installation failure, and is best addressed with the exterior sealant step covered earlier in this guide.
Long-Term Cost and Maintenance
Sticker price only tells part of the story. A C$25 tunnel extender segment looks cheap next to a C$230 complete wall-entry kit, but three or four segments plus the base flap they’re paired with often lands in a similar total range — so it pays to add up the full stack before assuming the accessory route is automatically the budget choice. Annual maintenance costs are modest across this whole category: expect to replace a worn flap (roughly C$15-C$35) every few years depending on use, and budget a tube of exterior sealant (under C$15) for a yearly seam check. Battery-powered microchip flaps, like those paired with the SureFlap Microchip Cat Flap Tunnel Extender, add a recurring cost of AA batteries a few times a year, which is a small but real ongoing expense mechanical flaps don’t carry. Canada’s own energy-efficiency programs have long emphasized that small envelope improvements compound over a home’s lifetime — a philosophy formalized in Natural Resources Canada’s long-running R-2000 program, which was built to exceed standard building code requirements for energy efficiency, indoor air quality, and environmental responsibility. The same logic applies at pet-door scale: a well-sealed tunnel installed once properly outlasts several rounds of “quick fix” caulking done reactively.
Masonry Cat Door Installation: Working With Brick, Block, and Stone
Cat door installation brick wall projects differ from stud-wall projects in three concrete ways: the cutting tool, the fastening method, and the timeline. A rotary hammer drill or diamond-blade saw is typically required to cut through solid brick or block, which most homeowners don’t own and will need to rent or hire out — factor this into your project budget even if the pet door itself is inexpensive. Fastening also changes: instead of screws driven into wood studs, masonry installations typically require masonry anchors or construction adhesive rated for exterior use, since a standard wood screw simply won’t bite into brick or concrete block. Finally, set expectations for timeline honestly — a masonry cat door installation realistically takes a full day for a first-timer, compared to the couple of hours a stud-wall project usually needs, largely because of dust control and the slower pace of cutting through solid material safely.
Products rated specifically for this wall type, like the Baboni 3-Flap Steel Wall Pet Door and a fully extended PetSafe Wall Entry Aluminum Pet Door with Telescoping Tunnel, are worth prioritizing over accessory-only tunnel extenders here, since masonry openings are harder to redo if a shorter tunnel doesn’t reach flush. If your home has heritage designation or is in a protected streetscape, it’s also worth a quick call to your municipality before cutting an exterior masonry wall — some older neighbourhoods have facade preservation rules that affect what modifications are permitted.
Beyond the installation logistics, it’s worth remembering why a secure, well-fitted tunnel matters for the cat using it, not just for your heating bill. A peer-reviewed assessment of risks and benefits of uncontrolled outdoor access for cats, co-authored by researchers at the University of Guelph’s Ontario Veterinary College, found that unrestricted roaming raises a cat’s risk of injury, disease, and traffic-related trauma, while also affecting local wildlife — a strong case for pairing any wall cat door with proper microchipping and, where possible, a supervised or enclosed outdoor space rather than unrestricted roaming.
Benefits vs Traditional Alternatives
| Factor | Wall Tunnel Cat Door | Standard Door-Mounted Flap | No Pet Door (Manual Opening) |
|---|---|---|---|
| Best For | Thick exterior or interior walls | Standard hollow-core doors | Renters or temporary situations |
| Draft Control | High with multi-flap tunnels | Moderate | None (door left ajar) |
| Installation Effort | Moderate to high | Low | None |
| Long-Term Cost | Low after install | Low | Higher energy loss over time |
| Security Options | Microchip available | Microchip or mechanical | None |
The comparison makes the trade-off explicit: a wall tunnel system asks for more upfront installation effort than a door-mounted flap, but it pays that back through better draft control and the flexibility to place the entry anywhere on a wall rather than being tied to an existing door. Leaving a door propped open — still common in older homes without a dedicated pet door — loses far more heat over a winter than either purpose-built option, making it the most expensive choice in the long run despite costing nothing upfront. For households already leaning toward better security, the microchip-recognition path available through several products on this list closes the gap that a purely mechanical flap leaves open.
Buyer’s Decision Framework
If your wall is standard 2×4 interior stud construction, choose The Kitty Pass Wall Entry Cat Door because it’s purpose-built for that exact assembly and installs fastest. If your wall is 12-18 cm and you don’t yet own a flap, choose the PetSafe Wall Entry Aluminum Pet Door with Telescoping Tunnel because it’s a complete, adaptable kit. If your wall exceeds 20 cm of solid brick or block, choose the Baboni 3-Flap Steel Wall Pet Door because it’s rated for that depth without stacking accessories. If you already own a microchip flap and just need more tunnel length, choose the matching accessory from PetSafe, SureFlap, or Cat Mate rather than replacing hardware that already works. And if your top priority is keeping out every animal except your own cat, choose a microchip-based system over any mechanical-flap alternative, regardless of wall thickness.
Frequently Asked Questions
❓ What wall thickness counts as a 'thick wall' for a cat door?
❓ Can I install a cat door in a brick wall myself?
❓ How much does a wall cat door with a tunnel extension cost in Canada?
❓ Do insulated wall cat doors actually help with Canadian winters?
❓ What size tunnel extension do I need for a 25 cm wall?
Conclusion
A cat door for thick wall installation isn’t a one-size-fits-all purchase, and honestly, that’s good news once you know what to measure. Standard stud walls, double-brick masonry, and interior partitions each point toward a different product on this list, and the real decision isn’t “which brand is best” so much as “which wall am I actually working with.” Measure first, choose between a complete kit and a stackable accessory second, and weigh microchip security against basic mechanical flaps based on how many neighbourhood animals you’re realistically trying to keep out. Whichever of these seven options fits your wall, the payoff is the same: a cat that comes and goes on their own schedule, and a tunnel that doesn’t quietly cost you a chunk of your heating bill every winter.
Recommended for You
- Wall Mounted Cat Door: 7 Best Picks for Canadian Homes 2026
- Cat Door for Interior Door: 7 Top Picks for Canadian Homes 2026
- Cat Door for Exterior Door: 7 Best Picks for Canadian Homes (2026)
Disclaimer: This article contains affiliate links. As an Amazon Associate, I earn from qualifying purchases. If you purchase products through these links, we may earn a small commission at no additional cost to you.
✨ Found this helpful? Share it with your friends! 💬🤗
